Editor’s Note: This is mirrored from RayWenderlich.com, and it was my first ever post on his website!.
Are you a busy Swift developer, with no time to learn Node.js, but still feeling drawn to server-side development? This Kitura tutorial will teach you how to create RESTful APIs written entirely in Swift.
You’ll build a “Today I Learned” app to help you learn and remember common acronyms. Along the way, you’ll learn how to:
- Create a backend API from scratch.
- Link your API to a CouchDB instance running on your local machine.
- Assign GET, POST, and DELETE routes for a model object.
Getting Started
To complete this Kitura tutorial, you’ll need:
- macOS 10.12 (Sierra) or higher
- Xcode 9.2 or newer
- Basic familiarity with Terminal, as you’ll use the command line quite a bit in this tutorial.
Note: It’s possible to use Kitura with simply a text editor and a standalone Swift installation, which makes it possible to run Kitura even on Linux! However, this tutorial uses Xcode to take advantage of autocomplete and the nuances of a familiar development environment.
Installing CouchDB
You’ll use a database called CouchDB in this Kitura tutorial. This is a NoSQL database that strictly enforces JSON and uses revision keys for updates. So it’s safe — and fast!
Homebrew, a popular package manager for macOS, is the easiest way to install CouchDB. If you don’t have Homebrew installed already, open Terminal and enter this command:
/usr/bin/ruby -e "$(curl -fsSL https://raw.githubusercontent.com/Homebrew/install/master/install)"
Enter your password if prompted. You should see Installation Successful once it completes.
Next, enter this command to install CouchDB:
brew install couchdb
Once it’s installed, enter this command to start CouchDB:
brew services start couchdb
To confirm CouchDB installed and started successfully, open a web browser and navigate to http://localhost:5984. You should see something like this:
{
  "couchdb": "Welcome",
  "uuid": "29b2fe0fb4054c61e6b4b8e01761707b",
  "version": "1.7.1",
  "vendor": {
      "name": "Homebrew",
      "version": "1.7.1"
  }
}
Note: If you’d prefer not to install CouchDB directly and have Docker installed, you may run it in Docker using the command:
docker run --name couchdb -p 5984:5984 -d couchdb
Before you can dive into this Kitura tutorial, you’ll need to first understand a little about Kitura and REST.
Kitura & RESTful API Routing
IBM created Kitura as an open-source framework in 2015, shortly after Apple open-sourced Swift. They modeled Kitura after Express.js, the de-facto framework for creating RESTful APIs using Node.js.
REST is an acronym for Representational State Transfer. In RESTful apps, each unique URL represents an object. Non-unique URLs represent actions, which are combined with RESTful verbs like GET to fetch objects, POST to insert, DELETE to remove and PUT to update objects.
Backend development often involves many components working together. You’ll only be concerned with two backend components in this Kitura tutorial: the API and database.
For example, if you want to populate a table view with a list of acronyms and their meanings, your client app sends a GET request to the backend. In practice, your app requests the URL http://yourAPI.com/acronyms.

The API receives your request and uses a router to decide how to handle it. The router checks all available routes, which are simply publicly accessible endpoints, to determine if there is a GET route ending in /acronyms. If it finds one, it executes the associated route’s code.
The /acronyms route then does the following:
- Retrieves the acronyms from the database
- Serializes them into JSON
- Packages them into a response
- Returns the response to the API to send to the client
This results in the following interaction between the API and database:

If an API is RESTful, then it must also be stateless. In our example, you can think of the API as the orchestrator, commanding data to and fro in your ecosystem. Once the request is fulfilled, the state of the API and its routes should be unchanged and able to handle the next request.

Just because the API is stateless doesn’t mean it isn’t allowed to store or modify objects. The API itself doesn’t store states, but it does query and update the database to fetch, store and modify objects’ states.
Setting up the Kitura Tutorial Project
Open Terminal and enter the following commands:
mkdir KituraTIL
cd KituraTIL
swift package init --type executable
This uses the Swift Package Manager to create a new executable.
You should see output like this:
Creating executable package: KituraTIL
Creating Package.swift
Creating README.md
Creating .gitignore
Creating Sources/
Creating Sources/KituraTIL/main.swift
Creating Tests/
Next, enter the following command to open Package.swift with Xcode:
open -a Xcode Package.swift
Replace the entire contents of Package.swift with the following:
// swift-tools-version:4.1

import PackageDescription

let package = Package(
  // 1
  name: "KituraTIL",
  dependencies: [
    // 2
    .package(url: "https://github.com/IBM-Swift/Kitura.git",
             .upToNextMinor(from: "2.4.1")),
    // 3
    .package(url: "https://github.com/IBM-Swift/HeliumLogger.git",
             .upToNextMinor(from: "1.7.1")),
    // 4
    .package(url: "https://github.com/IBM-Swift/Kitura-CouchDB.git",
             .upToNextMinor(from: "2.1.0")),
  ],
  //5
  targets: [
    .target(name: "KituraTIL",
            dependencies: ["Kitura" , "HeliumLogger", "CouchDB"],
            path: "Sources")
  ]
)
Here’s what each of these commands does:
- You first set the name of your target executable. By convention, you should name this after the enclosing directory.
- Here you declare the dependency for Kitura itself.
- This is a backend logging framework, which you’ll use to log messages while your backend app is running.
- You’ll use this dependency to allow Kitura to communicate with CouchDB.
- Finally, you declare your targets and their dependencies.
Save this file and go back to Terminal, where you should still be in the same directory containing Package.swift. Enter the following command:
swift build
This will generate a lot of logging, ending with logs about compiling your Kitura tutorial project. You’ll see this output at the end:
Compile Swift Module 'KituraTIL' (1 sources)
Linking ./.build/x86_64-apple-macosx10.10/debug/KituraTIL
Note: In case you get errors from swift build, enter the following in Terminal to verify your Swift version:</p>
swift --version
If your version is lower than Swift 4.1, this is likely your problem. To fix this, make sure that you have the latest version of Xcode 9 installed and then run the following command:
sudo xcode-select -s /Applications/Xcode.app
...where Xcode.app should be replaced with whatever you called Xcode 9.
If you're still having trouble, it's possible you're using swiftenv or another Swift version management tool, and you may need to manually set your Swift version to 4.1.
Here's the command to do this if you're using swiftenv:
swiftenv global 4.1
Using Kitura with Xcode
Still in Terminal, at the root directory for your Kitura tutorial project, enter the following command:
swift package generate-xcodeproj
You should see this output:
generated: ./KituraTIL.xcodeproj
Enter this command to open your new Xcode project:
open KituraTIL.xcodeproj/
You’ll then be greeted with this view:
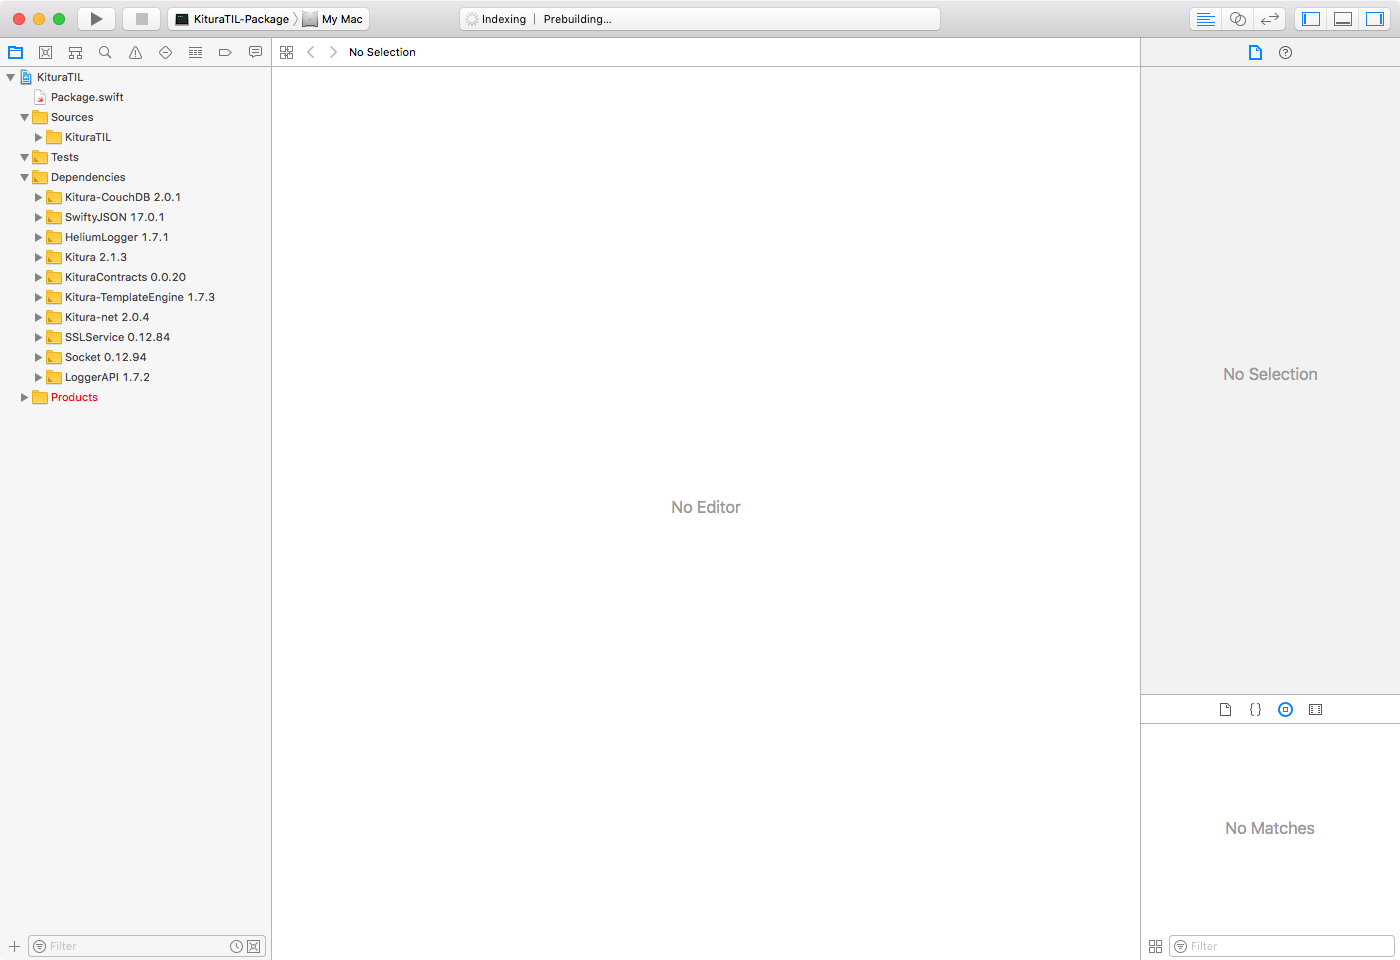
From here, you need to update the KituraTIL-Package scheme to run your executable. Go to the top of your Xcode window, and click the scheme pane where it says KituraTIL-Package. You should see this dialog:
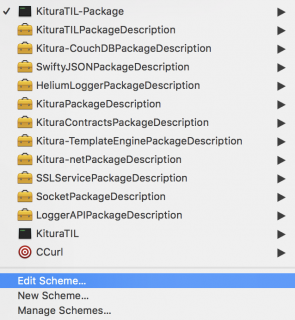
Click Edit Scheme, and another dialog will open. In the middle of the dialog, click the dropdown for Executable and select KituraTIL.
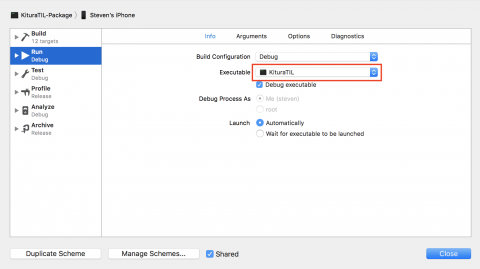
Click Close in the bottom-right corner of the dialog to dismiss it.
Next, make sure you’ve set to run this scheme on My Mac by clicking to the right of the scheme dropdown that you clicked earlier and selecting My Mac from the list:

Build and run, and you’ll see this printed to the console:
Hello, world!
Program ended with exit code: 0
You can safely ignore any compiler warnings about deprecations. Kitura and CouchDB use a few methods that were deprecated in Swift 4, but this shouldn’t cause any problems.
Awesome, you’re now ready to get your backend app up and running!
Using Kitura
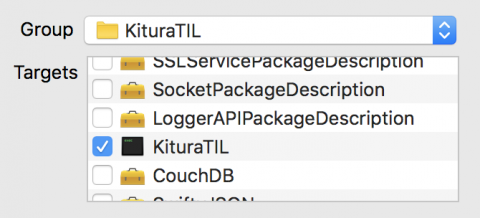
First, create a new Swift File named Application.swift in the same directory as main.swift. Make sure to add this file to the KituraTIL executable target:
Next, replace the contents of this file with the following:
import Kitura
import LoggerAPI

public class App {

  // 1
  let router = Router()

  public func run() {
    // 2
    Kitura.addHTTPServer(onPort: 8080, with: router)
    // 3
    Kitura.run()
  }
}
Here’s what this does:
- The Router will handle incoming requests by routing them to the appropriate endpoint.
- Here, you register
routerto run on port 8080. - Kitura will run infinitely on the main run loop after you call
run().
With your App class created, open main.swift and replace its contents with the following:
import Kitura
import HeliumLogger
import LoggerAPI

HeliumLogger.use()

let app = App()
app.run()
Here you create an App instance and run it.
The HeliumLogger.use() command sets up HeliumLogger as the default logger for Kitura. It’s good practice to “log early and log often”.
Build and run, and you should see log messages from Kitura appear in the console.
Next, navigate to http://localhost:8080 in your browser, and you should see this page:

Congratulations, you’re now running a Swift RESTful API on your local machine!
Creating Your Model
In this section, you’ll create a model type that represents an acronym.
Create a new file named Acronym.swift and remember to add it to the KituraTIL target.
Replace the contents of this file with the following:
// 1
struct Acronym: Codable {

  var id: String?
  var short: String
  var long: String

  init?(id: String?, short: String, long: String) {
    // 2
    if short.isEmpty || long.isEmpty {
      return nil
    }
    self.id = id
    self.short = short
    self.long = long
  }
}

// 3
extension Acronym: Equatable {

  public static func ==(lhs: Acronym, rhs: Acronym) -> Bool {
    return lhs.short == rhs.short && lhs.long == rhs.long
  }
}
Here’s what this does:
- By making
Acronymconform toCodable, you’ll be able to take advantage of a new Kitura feature named Codable Routing. You’ll learn more about this shortly. - Within the initializer, you validate that neither
shortnorlongare empty strings. - You make
Acronymconform toEquatableto enable you to determine if two acronyms are the same. You’ll use this later, as another form of validation.
Build and run your project to make sure everything builds properly.
Codable is simply a typealias that combines the Encodable and Decodable protocols. This ensures conforming objects can be converted both to and from external representations. In particular, Kitura uses this to easily convert instances to and from JSON.
Before Kitura 2.0, you had to pass a request object into every endpoint closure, parse properties manually, cast appropriately, do necessary transformations and finally create JSON to send as a response. It was a lot of work!
Fortunately, you can now leverage the power of Kitura’s Codable Routing to significantly reduce the boilerplate code in your routes. Win! You simply need to make your models conform to Codable to take advantage of this, as you did above.
With this theory out of the way, it’s now time to connect your API to CouchDB.
Connecting to CouchDB
Open Application.swift, and replace its contents with the following:
// 1
import CouchDB
import Foundation
import Kitura
import LoggerAPI

public class App {

  // 2
  var client: CouchDBClient?
  var database: Database?

  let router = Router()

  private func postInit() {
    // 3
  }

  private func createNewDatabase() {
    // 4
  }

  private func finalizeRoutes(with database: Database) {
    // 5
  }

  public func run() {
    // 6
    postInit()
    Kitura.addHTTPServer(onPort: 8080, with: router)
    Kitura.run()
  }
}
Let’s go over these changes:
- You first import CouchDB in order to set up your persistence layer.
- You add properties for client for CouchDB and database to keep track of changes.
- You’ll add code here after you’ve created your instance of App to connect to your database.
- This organizes your code stemming from the previous function.
- Once you’ve set up your database, you’ll list all available routes for your API to match against here.
- You call
postInit()from withinrun()to make this part of your API setup.
Next, complete postInit() by replacing // 3 with the following.:
// 1
let connectionProperties = ConnectionProperties(host: "localhost", port: 5984, secured: false)
client = CouchDBClient(connectionProperties: connectionProperties)
// 2
client!.dbExists("acronyms") { exists, _ in
  guard exists else {
    // 3
    self.createNewDatabase()
    return
  }
  // 4
  Log.info("Acronyms database located - loading...")
  self.finalizeRoutes(with: Database(connProperties: connectionProperties, dbName: "acronyms"))
}
Here’s what you just did:
- You created a
ConnectionPropertiesobject that you use to specify configuration values and a newCouchDBClient. - You check to see if a matching database already exists, so you don’t overwrite existing data.
- If a new database does not exist, then you call
createNewDatabase()to create a new database. - If a new database does exist, you call
finalizeRoutes(with:)to configure your routes.
Next, complete createNewDatabase() by replacing // 4 with the following:
Log.info("Database does not exist - creating new database")
// 1
client?.createDB("acronyms") { database, error in
  // 2
  guard let database = database else {
    let errorReason = String(describing: error?.localizedDescription)
    Log.error("Could not create new database: (\(errorReason)) - acronym routes not created")
    return
  }
  self.finalizeRoutes(with: database)
}
Here’s what this does piece by piece:
- You create your database with a given name. You can choose anything, but it’s best to keep it simple.
- You ensure the database exists, or else, you abort and log an error.
- Just like before, you call
finalizeRoutes(with:)to configure your routes
You won’t be able to implement finalizeRoutes just yet. You first need to complete your persistence layer. That’s what you’ll do in the next section.
Persisting Acronyms
Create a file named AcronymPersistence.swift and add it to the KituraTIL target.
Replace the contents of AcronymPersistence.swift with the following:
import Foundation
import CouchDB
// 1
import SwiftyJSON

extension Acronym {
  // 2
  class Persistence {

    static func getAll(from database: Database,
                       callback: @escaping (_ acronyms: [Acronym]?, _ error: NSError?) -> Void) {
      database.retrieveAll(includeDocuments: true) { documents, error in
        guard let documents = documents else {
          callback(nil, error)
          return
        }
        var acronyms: [Acronym] = []
        for document in documents["rows"].arrayValue {
          let id = document["id"].stringValue
          let short = document["doc"]["short"].stringValue
          let long = document["doc"]["long"].stringValue
          if let acronym = Acronym(id: id, short: short, long: long) {
            acronyms.append(acronym)
          }
        }
        callback(acronyms, nil)
      }
    }

    static func save(_ acronym: Acronym, to database: Database,
                     callback: @escaping (_ id: String?, _ error: NSError?) -> Void) {
      getAll(from: database) { acronyms, error in
        guard let acronyms = acronyms else {
          return callback(nil, error)
        }
        // 3
        guard !acronyms.contains(acronym) else {
          return callback(nil, NSError(domain: "Kitura-TIL",
                                       code: 400,
                                       userInfo: ["localizedDescription": "Duplicate entry"]))
        }
        database.create(JSON(["short": acronym.short, "long": acronym.long])) { id, _, _, error in
          callback(id, error)
        }
      }
    }

    // 4
    static func get(from database: Database, with id: String,
                    callback: @escaping (_ acronym: Acronym?, _ error: NSError?) -> Void) {
      database.retrieve(id) { document, error in
        guard let document = document else {
          return callback(nil, error)
        }
        guard let acronym = Acronym(id: document["_id"].stringValue,
                                    short: document["short"].stringValue,
                                    long: document["long"].stringValue) else {
            return callback(nil, error)
        }
        callback(acronym, nil)
      }
    }

    static func delete(with id: String, from database: Database,
                       callback: @escaping (_ error: NSError?) -> Void) {
      database.retrieve(id) { document, error in
        guard let document = document else {
          return callback(error)
        }
        let id = document["_id"].stringValue
        // 5
        let revision = document["_rev"].stringValue
        database.delete(id, rev: revision) { error in
          callback(error)
        }
      }
    }
  }
}
Here’s what this does in detail:
- Kitura’s CouchDB wrapper has yet to be updated to use
Codable, unfortunately. Instead, it utilizes SwiftyJSON to serialize objects into JSON. - You create
Persistenceas a nested class withinAcronym. This results inPersistence-namespaced methods for retrieving, saving and deletingAcronymsfrom CouchDB. This prevents name collisions in the event you have more than one model class, as more real-world apps do. - Remember how you made
Acronymconform toEquatable? This is where it comes in handy. You use it here to ensure you aren’t saving duplicate entries in the database. - In addition to fetching all available acronyms, you also provide a method to find a single
Acronymby matching itsid. - Here is where CouchDB differs from other NoSQL databases: each record has a revision stored as
_rev, which you can use to check that you are making a proper update.
Setting up Your Codable Routes
You’re finally ready to create your routes. Create a new file named AcronymRoutes.swift and add it to the KituraTIL target.
Replace the contents of AcronymRoutes.swift with the following:
import CouchDB
import Kitura
import KituraContracts
import LoggerAPI

private var database: Database?

func initializeAcronymRoutes(app: App) {
  database = app.database
  // 1
  app.router.get("/acronyms", handler: getAcronyms)
  app.router.post("/acronyms", handler: addAcronym)
  app.router.delete("/acronyms", handler: deleteAcronym)
}

// 2
private func getAcronyms(completion: @escaping ([Acronym]?, RequestError?) -> Void) {
  guard let database = database else {
    return completion(nil, .internalServerError)
  }
  Acronym.Persistence.getAll(from: database) { acronyms, error in
    return completion(acronyms, error as? RequestError)
  }
}

// 3
private func addAcronym(acronym: Acronym, completion: @escaping (Acronym?, RequestError?) -> Void) {
  guard let database = database else {
    return completion(nil, .internalServerError)
  }
  Acronym.Persistence.save(acronym, to: database) { id, error in
    guard let id = id else {
      return completion(nil, .notAcceptable)
    }
    Acronym.Persistence.get(from: database, with: id) { newAcronym, error in
      return completion(newAcronym, error as? RequestError)
    }
  }
}

// 4
private func deleteAcronym(id: String, completion: @escaping (RequestError?) -> Void) {
  guard let database = database else {
    return completion(.internalServerError)
  }
  Acronym.Persistence.delete(with: id, from: database) { error in
    return completion(error as? RequestError)
  }
}
Let’s look at the routes you just set up:
- Here you declare handlers for each route, which associate API endpoints with methods to be called.
getAcronymswill be called to fetchAcronymswhenever aGET /acronymsrequest is made.addAcronymwill insert a newAcronyminto the database whenever aPOST /acronymsrequest is made.deleteAcronymwill remove anAcronymfrom the database whenever aDELETE /acronymsrequest is made.
Notice the conciseness of each of your routes; the beauty of Kitura’s Codable Routing is that you don’t need to worry about requests or responses directly. Instead, Kitura will recognize the request that’s made, route it to the appropriate endpoint, execute just the relevant code and even create a response for you. Nice!
To complete your app, open Application.swift and complete finalizeRoutes() by replacing // 5 with the following:
self.database = database
initializeAcronymRoutes(app: self)
Log.info("Acronym routes created")
Testing Your API
Build and run your Kitura tutorial project, and navigate to http://localhost:8080 to ensure your API is still running.
Then, open Terminal and enter the following command:
curl http://localhost:8080/acronyms
If everything is set up correctly, you should get back an empty JSON placeholder ([]). This means you’ve correctly set up your GET route!
Now try adding a new acronym to your backend. Type the following command in the same terminal window:
curl -X POST http://localhost:8080/acronyms -H 'content-type: application/json' -d '{"short": "BRB", "long": "Be right back"}'
Hit Enter, and you should see a response like this:
{"id":"b2edde7b8032c30c7aeeff8d18000ad9","short":"BRB","long":"Be right back"}
In Xcode, Kitura’s log messages should include a Received POST type-safe request message.
To verify this actually saved to the database, enter the following GET command one more time:
curl http://localhost:8080/acronyms
If you get back the same JSON you entered inside an array, then congratulations! You’ve successfully created a working API!
Where to Go From Here?
This tutorial has introduced you to Kitura by building a backend API. However, that is not all Kitura can do! In part two of this tutorial series, you’ll learn how to use Kitura and Stencil to build a website that includes a front end.
You can download the completed version of the project using the Download Materials button at the top or bottom of this tutorial.
As part of Kitura 2.0, The Swift@IBM team has created a command line interface for Kitura that streamlines generating a similar starter project, without requiring you to write any code yourself! You can try this out (after completing this tutorial, of course) by entering the following commands in Terminal:
brew tap ibm-swift/kitura
brew install kitura
kitura init
If you’d like to learn more about Swift 4’s Codable protocol, check out our tutorial about it here.
You can also read through IBM’s introduction to Kitura Codable Routing here.
There’s a lot of material on the internet about Kitura, and some especially great stuff available directly from IBM! If you’d like to continue learning about Codable Routing and other Kitura 2.0 features, check out this tutorial.
I encourage you to comment in the forum below if you have any questions or comments!